Save
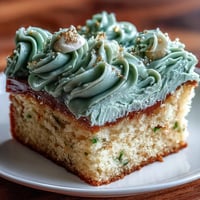
Save My roommate was absolutely obsessed with Cookie Run Kingdom, and one afternoon she was scrolling through fan recipes while I was making lunch. She showed me a picture of these Milk Cookies and asked if I could recreate them—not because she needed an exact replica, but because she wanted something that captured that delicate, almost dreamy quality of the game's aesthetic. I'd never made sandwich cookies before, but there was something appealing about their simplicity: tender discs of vanilla dough with a cloud-like cream center. That first batch turned golden in the oven while we watched cat videos, and when she bit into one, she got this satisfied smile that made the whole experiment feel worth it.
I brought these to my coworker's birthday potluck, and they disappeared faster than anything else on the dessert table—including the fancy chocolate torte someone spent hours making. People kept asking what they were, and there was something sweet about watching someone's face light up when they realized they could eat an entire sandwich cookie without guilt because they're surprisingly not heavy. One guy actually asked for the recipe, which is how I knew I'd nailed it.
Ingredients
- All-purpose flour (2 cups/240 g): The backbone of these cookies; it needs to be measured correctly so your dough isn't too dense or too delicate.
- Unsalted butter (1/2 cup/115 g for cookies, 1/4 cup/60 g for filling): Room temperature butter is absolutely non-negotiable here—it's what creates that light, tender crumb.
- Granulated sugar (2/3 cup/130 g): This sweetens the dough without overpowering the subtle vanilla flavor.
- Large egg (1): Acts as a binder and helps the cookies hold together without making them cake-like.
- Milk (2 tbsp/30 ml for dough, 1 tbsp/15 ml for filling): A small amount of milk keeps the dough tender and the filling silky.
- Vanilla extract (1 tsp for dough, 1 tsp for filling): Use pure vanilla if you can; it makes a noticeable difference in the final taste.
- Baking powder (1/2 tsp): Just enough to give the cookies a gentle lift without making them puffy.
- Salt (1/4 tsp): Enhances the vanilla flavor and balances the sweetness.
- Powdered sugar (1 cup/120 g, sifted): Sifting removes lumps and ensures a smooth, fluffy filling every time.
Tired of Takeout? 🥡
Get 10 meals you can make faster than delivery arrives. Seriously.
One email. No spam. Unsubscribe anytime.
Instructions
- Get your oven ready:
- Preheat to 350°F and line two baking sheets with parchment paper—this prevents sticking and ensures even browning on the bottom of your cookies.
- Mix your dry ingredients:
- Whisk flour, baking powder, and salt in a bowl; this distributes the leavening evenly so every cookie rises the same way.
- Cream butter and sugar:
- Beat them together until the mixture looks pale and fluffy, about 2 minutes with an electric mixer. You're incorporating air, which creates a tender texture.
- Add the wet ingredients:
- Beat in the egg, milk, and vanilla until everything is combined and smooth.
- Bring it all together:
- Gradually add the dry mixture to the wet ingredients, stirring just until a soft dough forms—overmixing leads to tough cookies.
- Shape and flatten:
- Roll the dough into 1-inch balls, place them 2 inches apart, then gently flatten each one to about 1/4-inch thickness with your palm or the bottom of a glass. They should look like delicate little discs.
- Bake until golden:
- Bake for 10-12 minutes; the edges should be just barely golden while the centers stay soft. This is the sweet spot between structure and tenderness.
- Cool completely:
- Let the cookies cool on the baking sheet for a few minutes, then transfer to a wire rack. They need to be completely cool before filling or they'll melt the cream.
- Make the cream filling:
- Beat softened butter until smooth, then gradually add sifted powdered sugar, milk, and vanilla, beating until fluffy and cloud-like.
- Assemble your sandwiches:
- Spread or pipe about 1 tablespoon of cream onto the flat side of half the cookies, then top with the remaining cookies to create sandwiches.
 Save
Save These cookies have become my go-to gift for people I want to impress without exhausting myself—they look homemade in the best possible way, and they taste like someone actually cared enough to make them by hand. There's something about a sandwich cookie that feels more intentional than a single cookie, like you put extra thought into it.
Flavor Variations That Work
Once you master the basic recipe, you can play around with flavors without reinventing the wheel. I've experimented with almond extract instead of vanilla, which gives the cookies a slightly sophisticated, almost floral note. A friend suggested adding lemon zest to the dough, and it created this bright, summery version that's perfect for picnics. For chocolate lovers, the original notes mention adding cocoa powder, but I've found that 2 tablespoons mixed into the dough works beautifully without making them taste like chocolate cookies—they stay delicate and just hint at chocolate.
Storage and Make-Ahead Tips
These cookies actually taste better the next day because the flavors meld and the filling sets slightly, giving you this perfect balance of soft and structured. You can make the cookies up to 3 days ahead and store them in an airtight container, but don't fill them until a few hours before serving. If you're making them for an event, bake the cookies the day before, fill them the morning of, and they'll stay fresh through dinner time.
Why These Cookies Stand Apart
What makes these special isn't complicated—it's the restraint of the recipe itself. There's no chocolate, no sprinkles required, no tricks. Just quality butter, real vanilla, and the discipline to not overbake. I think that's why they feel so elegant despite being straightforward. The cream filling is where you can get creative, adding a bit of almond extract, a pinch of cinnamon, or even a hint of rose water if you're feeling adventurous.
- A piping bag makes filling these look more polished than spreading, but honestly, spreading works just fine and is less cleanup.
- If your powdered sugar lumps up during beating, press it through a fine sieve before mixing to save yourself frustration.
- These freeze beautifully (unfilled) for up to a month, so batch-baking ahead is absolutely fair game.
 Save
Save Making these cookies is a small moment of calm in a chaotic week, and that matters more than the final product ever could. The fact that they turn out beautifully every time is just a bonus.
Recipe FAQs
- → What makes these cookies soft and tender?
The combination of softened butter, milk, and careful mixing creates a soft dough that bakes into tender cookies.
- → Can I add any flavor variations to the filling?
Yes, you can enhance the cream filling with cocoa powder, citrus zest, or a dash of cinnamon for a unique twist.
- → How do I ensure even cookie thickness before baking?
Gently flatten dough balls with your palm or bottom of a glass to about a quarter-inch thickness for uniform baking.
- → What is the best way to store these cookies?
Store them in an airtight container at room temperature for up to three days to maintain freshness.
- → Can these be made dairy-free?
Substitute butter and milk with plant-based alternatives to create a dairy-free version while maintaining texture.